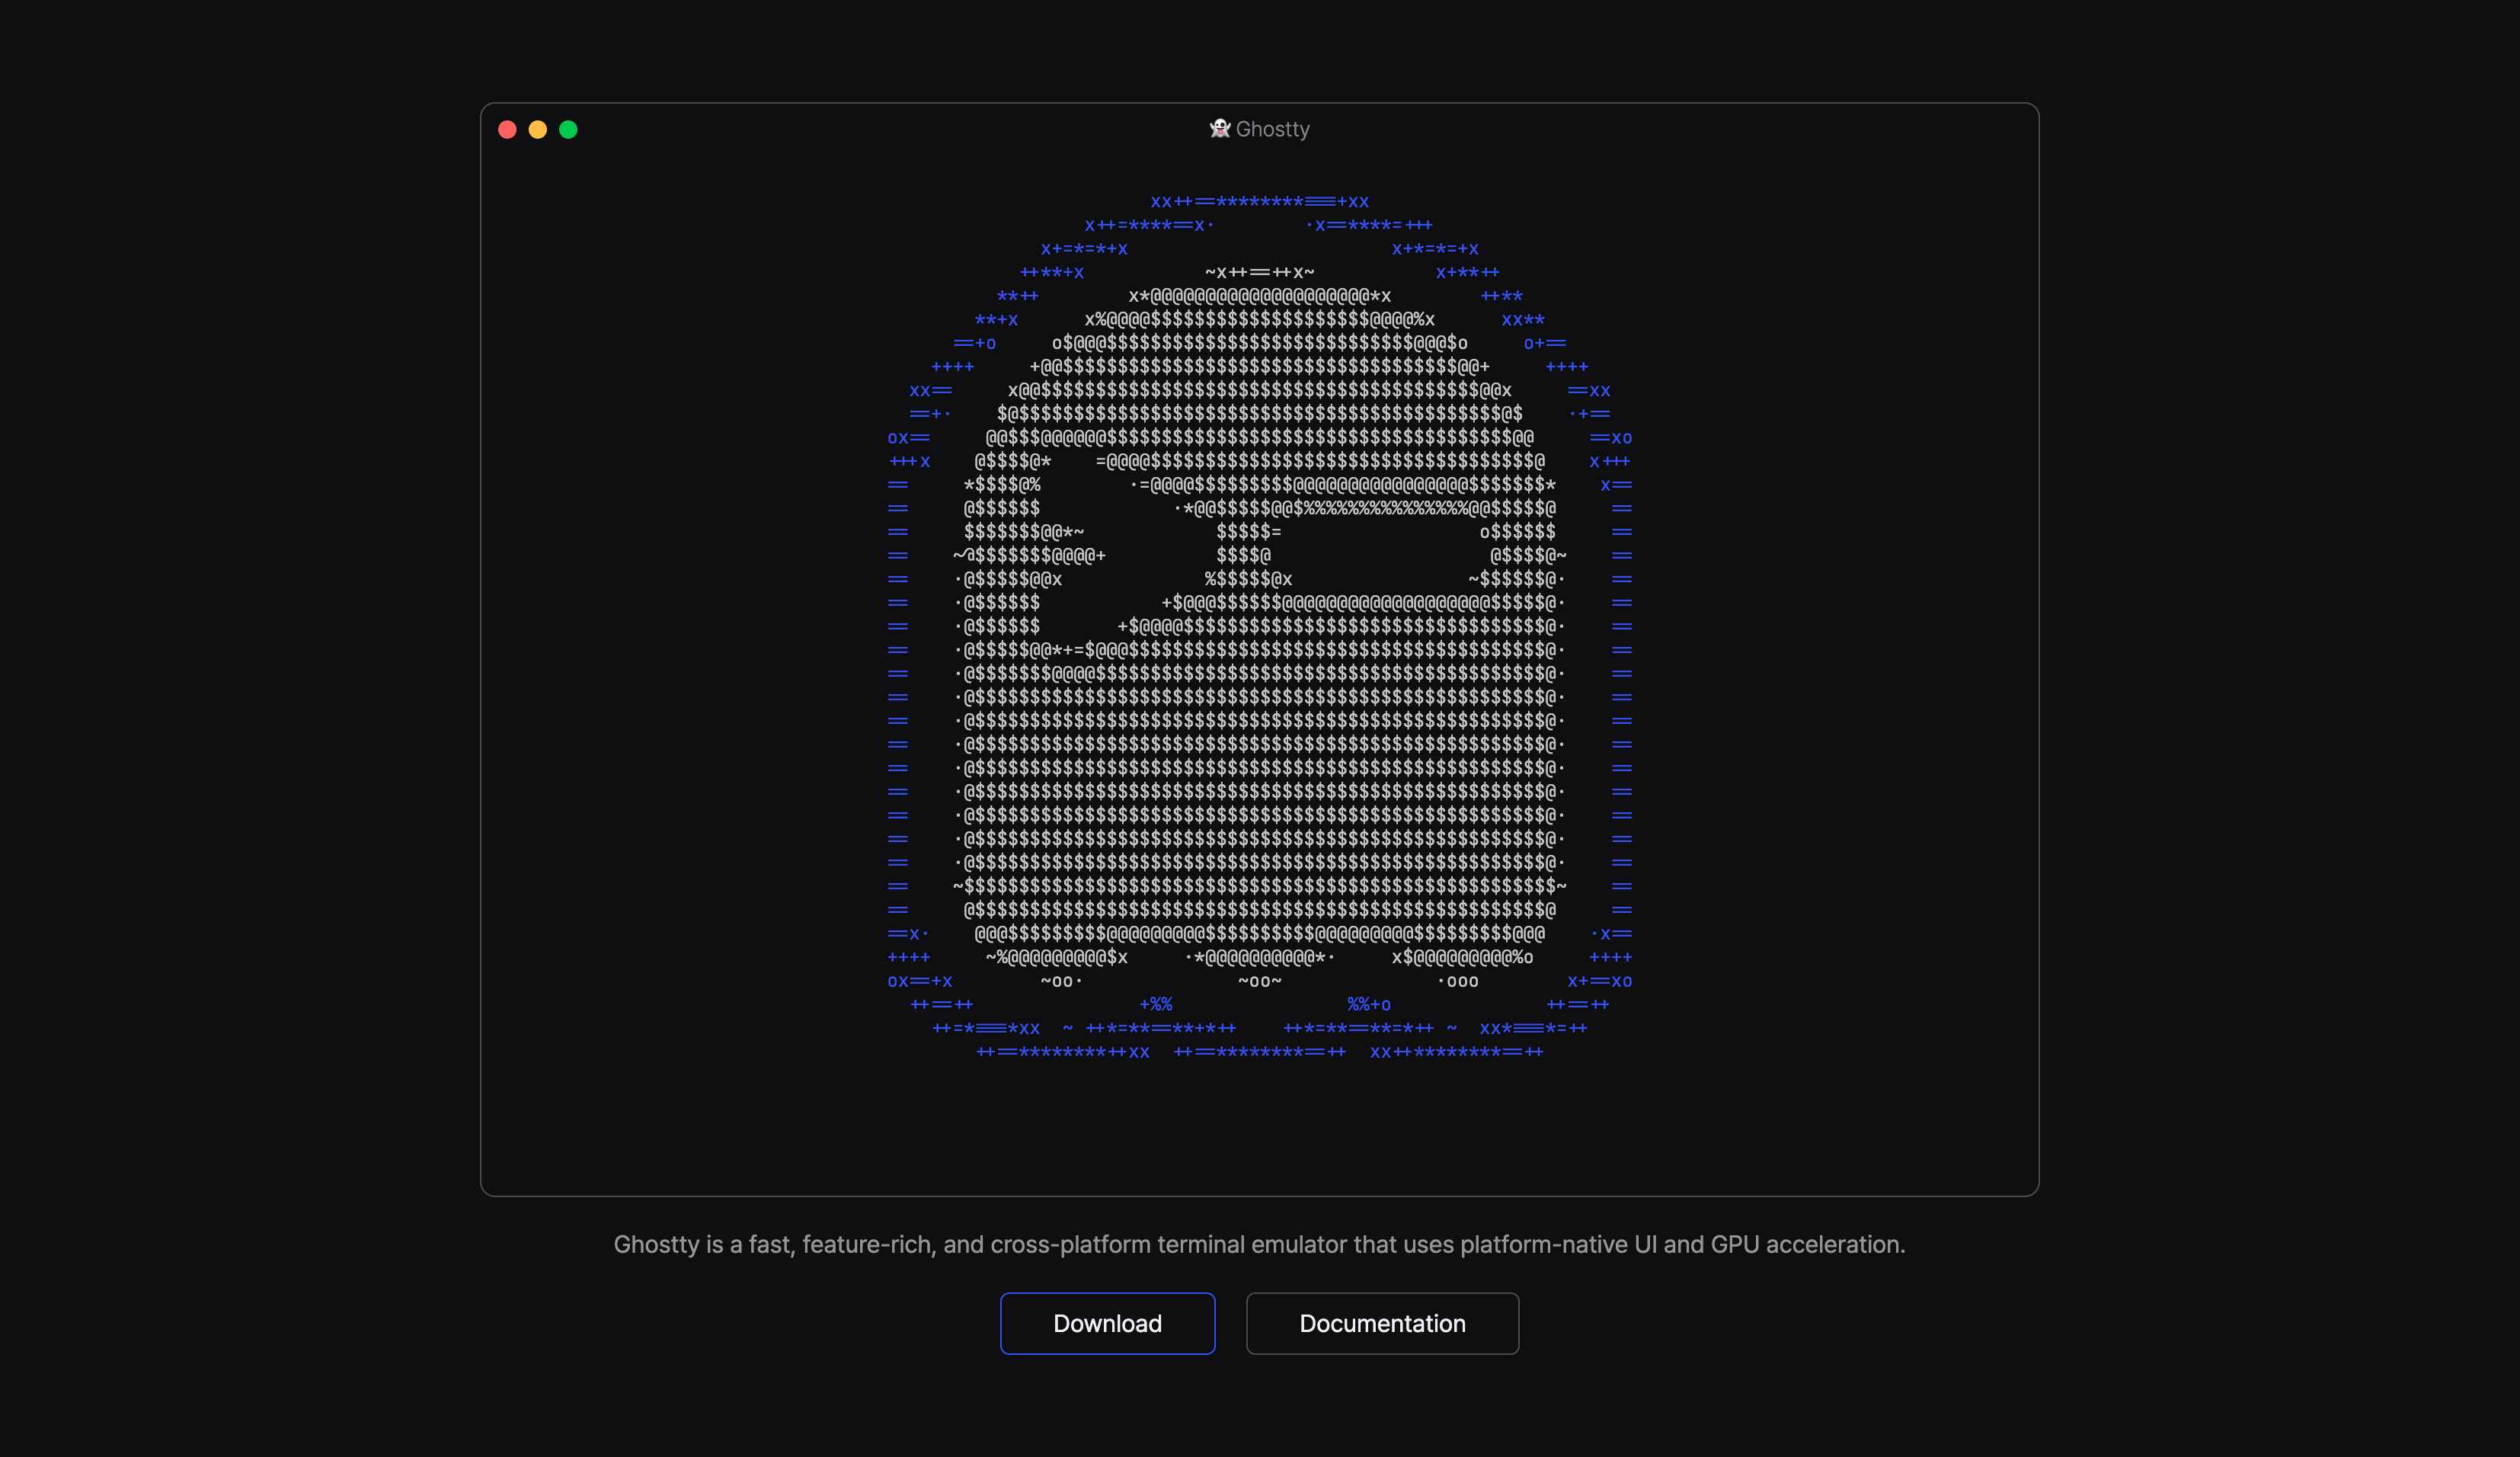
之前访问 Ghostty 官网 的时候,我对首页那段终端动画很感兴趣:它看起来像一段在真实终端里播放的字符动画,但又能非常自然地嵌在网页里。
好在 Ghostty 官网的源码也是开源的,所以这篇文章就顺着源码拆一下它的实现思路:动画数据从哪里来、这些 .txt 帧文件是怎么生成的,以及前端组件又是如何把它们播放出来的。
先看一下最终效果:
Ghostty
++++++============++++++++==**==*%*%********%*%*==**==++++=====*== ==*=====++++======+x x+======+x++====++ o=%$@@@@@@@@@@$%=o ++====++++==== x%@@@@@@$$$$$$$$$$$$@@@@@@%x ====+xxx===+ *@@@@$$$$$$$$$$$$$$$$$$$$$$$$@@@@* +===xx==== +@@@$$$$$$$$$$$$$$$$$$$$$$$$$$$$$$$$@@@+ ====x+==x· +@@$$$$$$$$$$$$$$$$$$$$$$$$$$$$$$$$$$$$$$@@+ ·x==++==++ @@$$$$$$$$$$$$$$$$$$$$$$$$$$$$$$$$$$$$$$$$$$@@ ++==xx== x@$$$$@@@@$$$$$$$$$$$$$$$$$$$$$$$$$$$$$$$$$$$$$$@x ==xo++++ +@$$$@@=ox%@@@@$$$$$$$$$$$$$$$$$$$$$$$$$$$$$$$$$$$@+ ++++==+~ @$$$$$ o%@@@@$$$$$$$$$$$$$$$$$$$$$$$$$$$$$$$$@ ~+==== $$$$$$$ x%@@@$$$$$$@@@@@@@@@@@@@@@@@@@$$$$$$ ==== @$$$$$@@+ *$$$$$$~ %$$$$$@ ==== ·@$$$$$$$@@@@+ $@$$@ @$$$$@· ==== ·@$$$$$$@$= ~$$$$$* x$$$$$@· ==== ·@$$$$$$ o%@@$$$$$@@@$$$$$$$$$$$$$$$@@$$$$$@· ==== ·@$$$$$$ o*@@@@$$$$$$$$$$$$$$$$$$$$$$$$$$$$$$$$@· ==== ·@$$$$$@% ~*@@@@$$$$$$$$$$$$$$$$$$$$$$$$$$$$$$$$$$$$@· ==== ·@$$$$$$@@@@@@$$$$$$$$$$$$$$$$$$$$$$$$$$$$$$$$$$$$$$$$@· ==== ·@$$$$$$$$$$$$$$$$$$$$$$$$$$$$$$$$$$$$$$$$$$$$$$$$$$$$@· ==== ·@$$$$$$$$$$$$$$$$$$$$$$$$$$$$$$$$$$$$$$$$$$$$$$$$$$$$@· ==== ·@$$$$$$$$$$$$$$$$$$$$$$$$$$$$$$$$$$$$$$$$$$$$$$$$$$$$@· ==== ·@$$$$$$$$$$$$$$$$$$$$$$$$$$$$$$$$$$$$$$$$$$$$$$$$$$$$@· ==== ·@$$$$$$$$$$$$$$$$$$$$$$$$$$$$$$$$$$$$$$$$$$$$$$$$$$$$@· ==== ·@$$$$$$$$$$$$$$$$$$$$$$$$$$$$$$$$$$$$$$$$$$$$$$$$$$$$@· ==== ·@$$$$$$$$$$$$$$$$$$$$$$$$$$$$$$$$$$$$$$$$$$$$$$$$$$$$@· ==== ~$$$$$$$$$$$$$$$$$$$$$$$$$$$$$$$$$$$$$$$$$$$$$$$$$$$$$$~ ==== @$$$$$$$$$$$$$$$$$$$$$$$$$$$$$$$$$$$$$$$$$$$$$$$$$$$$@ ====x· @@@$$$$$$$$$@@@@@@@@@$$$$$$$$$$@@@@@@@@@$$$$$$$$$@@@ ·+==++++ ~%@@@@@@@@@%o =@@@@@@@@@@= o%@@@@@@@@@%~ ++xx==+x ~~~ ·~~· ~~· x+====++ x+%% %%++ +===++**=%++ooox==*===++**=%++xoox++%=**++===*==xooo++%=**++++++==++++ ++++====++++ ++++==++++
首页组件
从首页入口开始看,核心逻辑在 HomeContent 里。这里最值得关注的是 AnimatedTerminal 组件,它接收了一组 frames,然后按照固定间隔切换当前帧。
"use client";

import AnimatedTerminal from "@/components/animated-terminal";
import GridContainer from "@/components/grid-container";
import { ButtonLink } from "@/components/link";
import { P } from "@/components/text";
import type { TerminalFontSize } from "@/components/terminal";
import type { TerminalsMap } from "./terminal-data";
import { useEffect, useState } from "react";
import s from "./home-content.module.css";

interface HomeClientProps {
  terminalData: TerminalsMap;
}

/** Tracks the current viewport size for responsive terminal sizing. */
function useWindowSize() {
  const [width, setWidth] = useState(0);
  const [height, setHeight] = useState(0);
  useEffect(() => {
    function updateSize() {
      setWidth(window.innerWidth);
      setHeight(window.innerHeight);
    }
    window.addEventListener("resize", updateSize);
    updateSize();

    return () => window.removeEventListener("resize", updateSize);
  }, []);
  return [width, height];
}

/** Renders the animated terminal hero and action links for the homepage. */
export default function HomeClient({ terminalData }: HomeClientProps) {
  const animationFrames = Object.keys(terminalData)
    .filter((k) => {
      return k.startsWith("home/animation_frames");
    })
    .map((k) => terminalData[k]);

  // Calculate what font size we should use based off of
  // Width & Height considerations. We will pick the smaller
  // of the two values.
  const [windowWidth, windowHeight] = useWindowSize();
  const widthSize =
    windowWidth > 1100 ? "small" : windowWidth > 674 ? "tiny" : "xtiny";
  const heightSize =
    windowHeight > 900 ? "small" : windowHeight > 750 ? "tiny" : "xtiny";
  let fontSize: TerminalFontSize = "small";
  const sizePriority = ["xtiny", "tiny", "small"];
  for (const size of sizePriority) {
    if (widthSize === size || heightSize === size) {
      fontSize = size;
      break;
    }
  }

  return (
    <main className={s.homePage}>
      {/* Don't render the content until the window width has been
        calculated, else there will be a flash from the smallest size
        of the terminal to the true calculated size */}
      {windowWidth > 0 && (
        <>
          <section className={s.terminalWrapper} aria-hidden={true}>
            <AnimatedTerminal
              title={"👻 Ghostty"}
              fontSize={fontSize}
              whitespacePadding={
                windowWidth > 950 ? 20 : windowWidth > 850 ? 10 : 0
              }
              className={s.animatedTerminal}
              columns={100}
              rows={41}
              frames={animationFrames}
              frameLengthMs={31}
            />
          </section>

          <GridContainer>
            <P weight="regular" className={s.tagline}>
              Ghostty is a fast, feature-rich, and cross-platform terminal
              emulator that uses platform-native UI and GPU acceleration.
            </P>
          </GridContainer>

          <GridContainer className={s.buttonsList}>
            <ButtonLink href="/download" text="Download" size="large" />
            <ButtonLink
              href="/docs"
              text="Documentation"
              size="large"
              theme="neutral"
            />
          </GridContainer>
        </>
      )}
    </main>
  );
}
HomeContent 做了两件事:
- 从
terminalData中筛出home/animation_frames下面的帧数据 - 根据窗口宽高选择终端字体尺寸,避免终端在小屏幕下撑破布局
真正负责播放动画的是 AnimatedTerminal:
"use client";

import { useEffect, useState } from "react";
import Terminal, { type TerminalProps } from "../terminal";

// A simple animation frame loop manager that's tied to requestAnimationFrame
// and should always keep frames in lock step with timing updates
class AnimationManager {
  _animation: number | null = null;
  callback: () => void;
  lastFrame = -1;
  frameTime = 1000 / 30; // 30fps

  constructor(callback: () => void, fps = 30) {
    this.callback = callback;
    this.frameTime = 1000 / fps;
  }

  updateFPS(fps: number) {
    this.frameTime = 1000 / fps;
  }

  start() {
    if (this._animation != null) return;
    this._animation = requestAnimationFrame(this.update);
  }

  pause() {
    if (this._animation == null) return;
    this.lastFrame = -1;
    cancelAnimationFrame(this._animation);
    this._animation = null;
  }

  update = (time: number) => {
    const { lastFrame } = this;
    let delta = time - lastFrame;
    if (this.lastFrame === -1) {
      this.lastFrame = time;
    } else {
      while (delta >= this.frameTime) {
        this.callback();
        delta -= this.frameTime;
        this.lastFrame += this.frameTime;
      }
    }
    this._animation = requestAnimationFrame(this.update);
  };
}

const KONAMI_CODE = [
  "arrowup",
  "arrowup",
  "arrowdown",
  "arrowdown",
  "arrowleft",
  "arrowright",
  "arrowleft",
  "arrowright",
  "b",
  "a",
];

export type AnimationFrame = string[];

export type AnimatedTerminalProps = Omit<TerminalProps, "lines"> & {
  frames: AnimationFrame[];
  frameLengthMs: number;
};

export default function AnimatedTerminal({
  className,
  columns,
  rows,
  fontSize,
  title,
  frames,
  whitespacePadding,
  frameLengthMs,
}: AnimatedTerminalProps) {
  const baseFps = 1000 / frameLengthMs;
  const [currentFrame, setCurrentFrame] = useState(16);
  const [animationManager] = useState(
    () =>
      new AnimationManager(() => {
        setCurrentFrame((currentFrame) => (currentFrame + 1) % frames.length);
      }, baseFps),
  );

  useEffect(() => {
    const reducedMotion =
      window.matchMedia("(prefers-reduced-motion: reduce)").matches === true;
    if (reducedMotion) {
      return;
    }

    const handleFocus = () => animationManager.start();
    const handleBlur = () => animationManager.pause();
    const codeInProgress: string[] = [];
    const handleKeyUp = (event: KeyboardEvent) => {
      const key = event.key.toLowerCase();
      if (KONAMI_CODE[codeInProgress.length] === key) {
        codeInProgress.push(key);
      } else {
        codeInProgress.length = 0;
      }
      if (codeInProgress.length !== KONAMI_CODE.length) {
        return;
      }
      if (animationManager.frameTime === 1000 / baseFps) {
        animationManager.updateFPS(240);
      } else {
        animationManager.updateFPS(baseFps);
      }
      codeInProgress.length = 0;
    };
    window.addEventListener("focus", handleFocus);
    window.addEventListener("blur", handleBlur);
    window.addEventListener("keyup", handleKeyUp);

    if (document.visibilityState === "visible") {
      animationManager.start();
    }
    return () => {
      window.removeEventListener("focus", handleFocus);
      window.removeEventListener("blur", handleBlur);
      window.removeEventListener("keyup", handleKeyUp);
    };
  }, [animationManager, frames.length, baseFps]);

  return (
    <Terminal
      className={className}
      columns={columns}
      whitespacePadding={whitespacePadding}
      rows={rows}
      title={title}
      fontSize={fontSize}
      lines={frames[currentFrame]}
      disableScrolling={true}
    />
  );
}
这个组件本身并不关心帧是怎么来的。它只维护一个 currentFrame,然后在 requestAnimationFrame 驱动的循环里递增索引,最后把当前帧传给 Terminal 组件渲染。
也就是说,前端播放部分其实很克制:它没有在浏览器里做图像处理,也没有动态计算字符画,只是在播放一组已经准备好的文本帧。
帧数据从哪里来
继续往上找,HomeContent 接收的 terminalData 来自首页的 page.tsx。
import HomeContent from "./HomeContent";
import { loadAllTerminalFiles } from "./terminal-data";
import type { Metadata } from "next";

/** Defines document metadata for the Ghostty homepage. */
export const metadata: Metadata = {
  title: "Ghostty",
  description:
    "Ghostty is a fast, feature-rich, and cross-platform terminal emulator that uses platform-native UI and GPU acceleration.",
};

/** Loads homepage terminal data and renders the client-side home content. */
export default async function HomePage() {
  const terminalData = await loadAllTerminalFiles("/home");
  return <HomeContent terminalData={terminalData} />;
}
这里调用了 loadAllTerminalFiles('/home'),把 terminals/home 目录下的文本文件都读出来。再看一下 loadAllTerminalFiles 的实现:
import { promises as fs } from "node:fs";

/** Provides POSIX and path utilities for terminal file traversal. */
const nodePath = require("node:path");

/** Filesystem location for checked-in terminal snapshot data. */
const TERMINALS_DIRECTORY = "./terminals";

/** Extension used by terminal snapshot files. */
const TERMINAL_CONTENT_FILE_EXTENSION = ".txt";

export type TerminalsMap = { [k: string]: string[] };

/** Loads terminal text files and returns them keyed by slug path. */
export async function loadAllTerminalFiles(
  subdirectory?: string,
): Promise<TerminalsMap> {
  const allPaths = (
    await collectAllFilesRecursively(`${TERMINALS_DIRECTORY}${subdirectory}`)
  ).filter((path) => path.endsWith(TERMINAL_CONTENT_FILE_EXTENSION));

  const map: Map<string, Array<string>> = new Map<string, Array<string>>();
  for (const path of allPaths) {
    const slug = nodePath
      .relative(TERMINALS_DIRECTORY, path)
      .split(".")
      .slice(0, -1)
      .join(".");
    let content = (await fs.readFile(path, "utf8")).split(/\n/g);
    if (content[content.length - 1] === "") {
      content = content.slice(0, -1);
    }
    map.set(slug, content);
  }
  return Object.fromEntries(map);
}

/** Walks a directory recursively and returns full file paths. */
async function collectAllFilesRecursively(root: string): Promise<string[]> {
  const files: string[] = [];
  const entries = await fs.readdir(root, { withFileTypes: true });

  for (const entry of entries) {
    const fullPath = nodePath.join(root, entry.name);
    if (entry.isDirectory()) {
      files.push(...(await collectAllFilesRecursively(fullPath)));
      continue;
    }
    files.push(fullPath);
  }

  return files;
}
它做了下面几件事:
- 递归遍历
terminals目录 - 找出所有
.txt文件 - 把每个文件按行读取成
string[] - 用文件路径生成 slug,最终得到一个
{ slug: 文件内容[] }的映射
所以 AnimatedTerminal 拿到的 frames,本质上就是一组二维文本数据:第一层数组表示动画帧,第二层数组表示这一帧里的每一行。
我们再看一下 terminals 目录下的文件结构
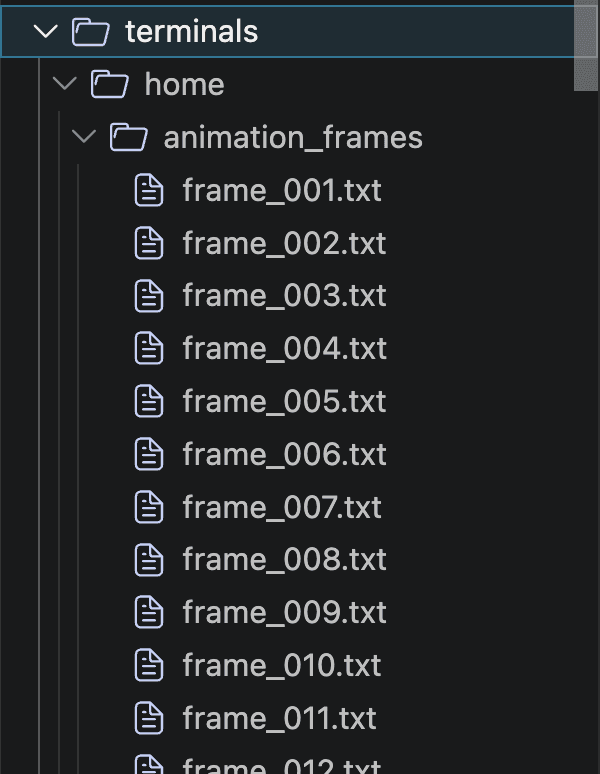
打开其中一个 .txt 文件,就能看到已经处理好的字符画帧:
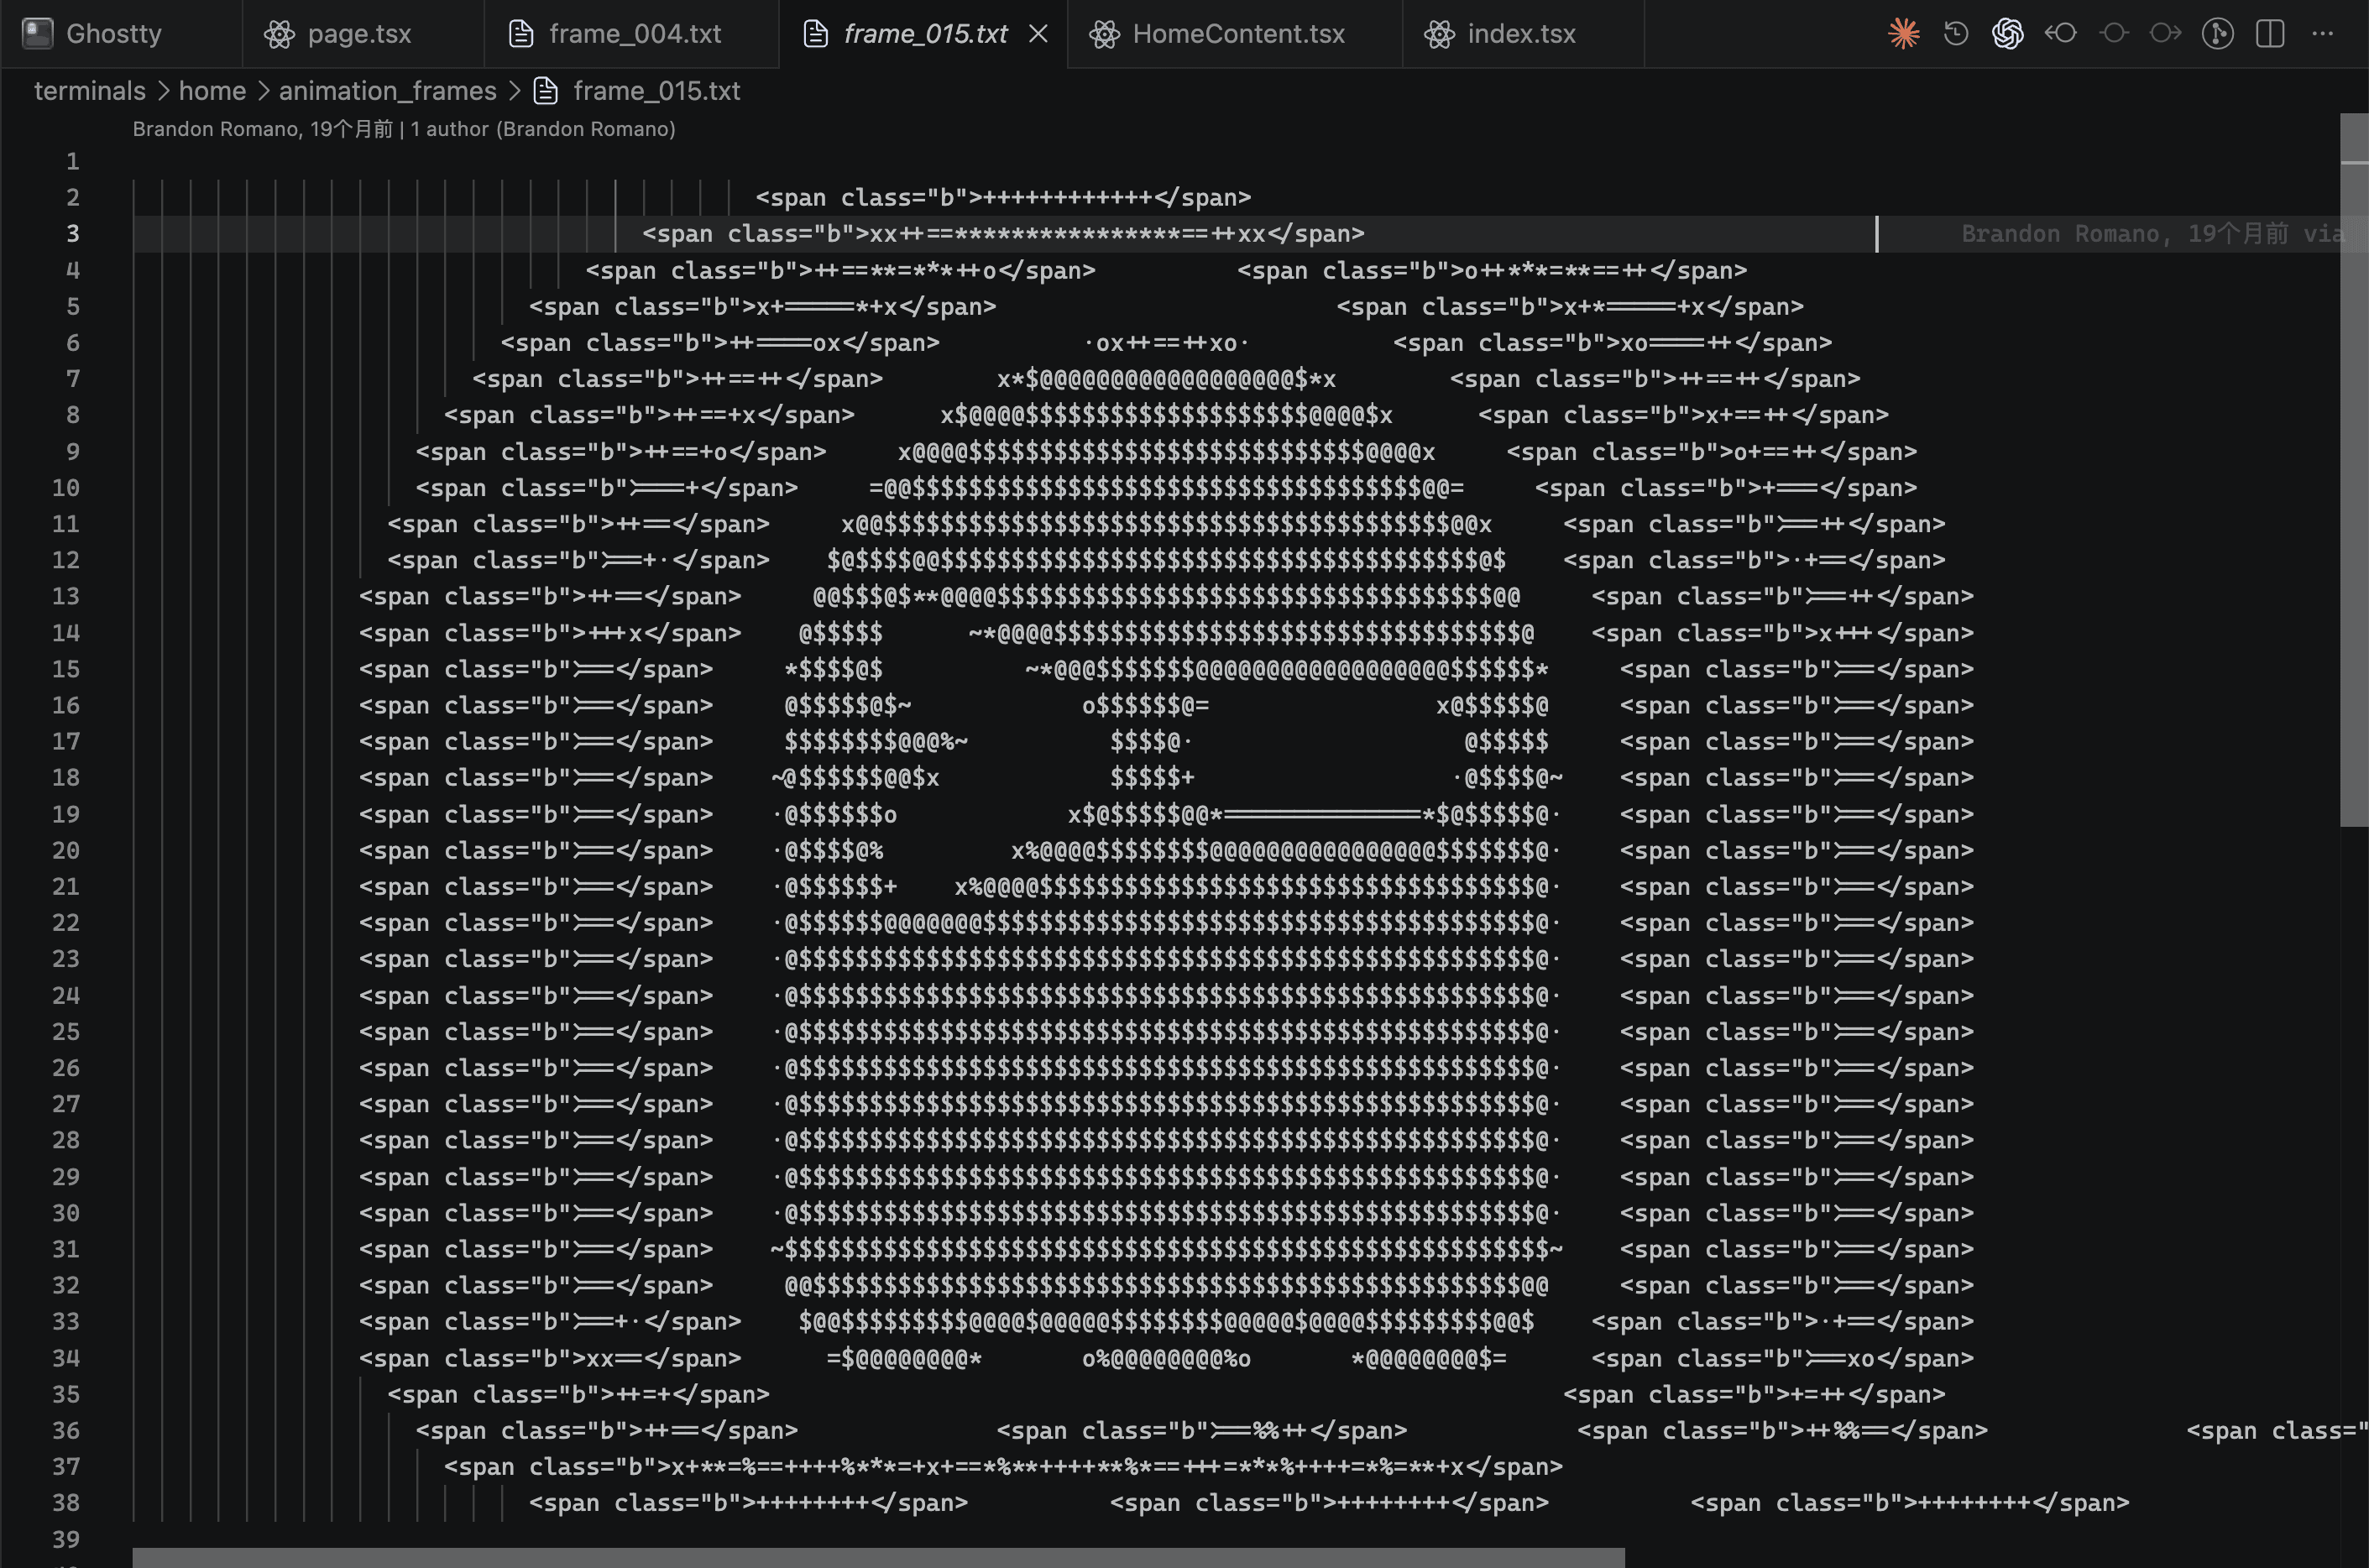
到这里,网页播放链路已经清楚了:
帧文件里并不是纯文本,蓝色部分会被包进 <span class="b">...</span>。后续 Terminal 渲染时会把 .b 这类片段高亮成品牌色,于是终端里的 Ghostty 图案就有了分层。
mp4 -> 一组 txt 帧 -> terminalData -> AnimatedTerminal -> Terminal接下来的问题是:这些 .txt 帧文件是怎么从视频生成出来的?
视频转终端帧
在 bin/video-to-terminal 目录下,可以看到一个 video-to-terminal.sh 脚本和一个 mp4 文件:
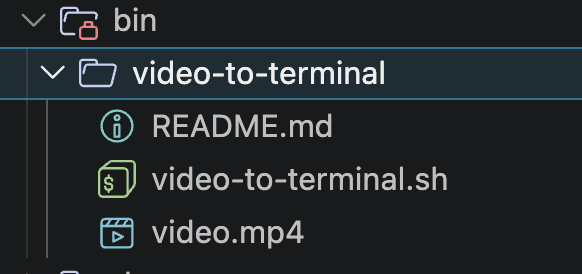
脚本内容如下:
#!/usr/bin/env bash

# The ratio between the width : height of the end-rendering font
FONT_RATIO=".44"
VIDEO_FORMATS=("mp4" "mkv")
OUTPUT_FPS=24
OUTPUT_COLUMNS=100

# Colors Used
BLUE="0,0,230"
BLUE_DISTANCE_TOLERANCE=90
BLUE_MIN_LUMINANCE=10
BLUE_MAX_LUMINANCE=21

WHITE="215,215,215"
WHITE_DISTANCE_TOLERANCE=140
WHITE_MIN_LUMINANCE="165"
WHITE_MAX_LUMINANCE="255"

#
# Outputs the distance between two colors to stdout
#
# @param $1: r,g,b color #1
# @param $2: r,g,b color #2
#
color_distance_from() {
  awk -v c1="$1" -v c2="$2" '
    BEGIN {
      split(c1, a, ",");
      split(c2, b, ",");
      print abs(a[1] - b[1]) + abs(a[2] - b[2]) + abs(a[3] - b[3]);
    }
    function abs(x) { return ((x < 0) ? -x : x) }
  '
}

#
# Outputs the calculated pixel for the color to stdout
#
# @param $1: The r,g,b Pixel
#
pixel_for() {
  local r="$(echo "$1" | cut -f1 -d ',')"
  local g="$(echo "$1" | cut -f2 -d ',')"
  local b="$(echo "$1" | cut -f3 -d ',')"

  # https://en.wikipedia.org/wiki/Relative_luminance
  # Relative luminance scaled from 0-9
  # We'll use this to determine the Pixel to render, (. o x X E H), etc.
  # TODO: I might want to grab a _very specific_ slice of luminance (e.g from 200 -> 220)
  # TODO: Only call this if it hits a pixel
  #local scaled_luminance="$(echo "(0.2126 * $r + 0.7152 * $g + 0.0722 * $b) * 9 / 255" | bc)"
  local luminance=$(awk -v r="$r" -v g="$g" -v b="$b" 'BEGIN{print int((0.2126 * r + 0.7152 * g + 0.0722 * b) / 1)}')

  local blue_distance="$(color_distance_from "$BLUE" "$1")"
  local white_distance="$(color_distance_from "$WHITE" "$1")"

  if [[ $blue_distance -lt $BLUE_DISTANCE_TOLERANCE ]]; then
    local scaled_luminance=$(awk -v luminance="$luminance" -v min="$BLUE_MIN_LUMINANCE" -v max="$BLUE_MAX_LUMINANCE" 'BEGIN{print int((luminance - min) * 9 / (max - min))}')
    echo "B$scaled_luminance"
  elif [[ $white_distance -lt $WHITE_DISTANCE_TOLERANCE ]]; then
    local scaled_luminance=$(awk -v luminance="$luminance" -v min="$WHITE_MIN_LUMINANCE" -v max="$WHITE_MAX_LUMINANCE" 'BEGIN{print int((luminance - min) * 9 / (max - min))}')
    echo "W$scaled_luminance"
  else
    echo " "
  fi
}

#
# @param $1: The video file
# @param $2: The directory to place the frame images
#
generate_frame_images() {
  local video_file="$1"
  local working_dir="$2"

  local frame_images_dir="$working_dir/frame_images"
  mkdir "$frame_images_dir"

  # Outputs a png file for each frame
  ffmpeg \
    -loglevel error \
    -i "$video_file" \
    -vf "scale=$OUTPUT_COLUMNS:-2,fps=$OUTPUT_FPS" \
    "$frame_images_dir/frame_%04d.png"

  for f in $(find "$frame_images_dir" -name '*.png' | sort); do
    # We need to squish the image, as the terminal "pixels" will not be 1:1,
    local squished_image_file="$(echo "$f" | sed 's/\.png$/_squished\.png/g')"
    local image_height="$(magick identify -ping -format '%h' "$f")"
    local new_height=$(echo "$FONT_RATIO * $image_height" | bc | jq '.|ceil')

    magick "$f" -resize "x$new_height"'!' "$squished_image_file"
    rm "$f"
    mv "$squished_image_file" "$f"

    # Generate a parsable .txt file for each frame
    local imagemagick_text_file="$(echo "$f" | sed 's/\.png$/_im\.txt/g')"
    local output_text_file="$(echo "$f" | sed 's/\.png$/\.txt/g')"
    magick "$f" "$imagemagick_text_file"
    cat "$imagemagick_text_file" | tail -n +2 | while read line; do
      # Read / parse each line
      local xy="$(echo "$line" | cut -f1 -d ' ' | sed 's/://g')"
      local column=$(echo "$xy" | sed 's/\,.*//g')
      local row=$(echo "$xy" | sed 's/.*\,//g')

      # Echo out a new line on each new row
      if [[ "$column" = "0" ]] && [[ "$row" != "0" ]]; then
        echo "" >> "$output_text_file"
      fi

      local rgb="$(echo "$line" | cut -f2 -d ' ' | cut -d "(" -f 2 | cut -d ")" -f1)"
      local pixel="$(pixel_for "$rgb")"
      echo -n "$pixel" >> "$output_text_file"
    done

    cat "$output_text_file" \
      | perl -pe 's/(B[0-9](?:B[0-9])*)/<span class="b">\1<\/span>/g' \
      | sed 's/B//g' \
      | sed 's/W//g' \
      | sed 's/0/·/g' \
      | sed 's/1/~/g' \
      | sed 's/2/o/g' \
      | sed 's/3/x/g' \
      | sed 's/4/+/g' \
      | sed 's/5/=/g' \
      | sed 's/6/*/g' \
      | sed 's/7/%/g' \
      | sed 's/8/$/g' \
      | sed 's/9/@/g' \
      > "$output_text_file.tmp"
    mv "$output_text_file.tmp" "$output_text_file"
    rm "$imagemagick_text_file"
    echo "Processed $f"
    rm "$f"
    sleep 1 # Make it easy to cancel at this breakpoint for testing
  done
}

#
# @param $1: The video file
#
video_to_terminal() {
  local video_file="$1"
  if [[ ! -f "$video_file" ]]; then
    >&2 echo "Input file '$1' does not exist"
    return 1
  fi

  local file_extension="$(echo "${video_file##*.}" | awk '{print tolower($0)}')"
  if [[ "$(echo ${VIDEO_FORMATS[@]} | grep -ow "$file_extension")" == "" ]]; then
    >&2 echo "Does not support '$file_extension' files. Use one of: ${VIDEO_FORMATS[@]}"
  fi

  local working_dir="./$(uuidgen)"
  mkdir "$working_dir"

  generate_frame_images "$video_file" "$working_dir"
}

video_to_terminal "$1"
这个脚本的作用可以概括为一句话:把视频拆成图片帧,再把每一张图片转换成终端可渲染的字符画。
拆开看,它主要分成四步。
配置输出尺寸和颜色范围
脚本开头定义了一组常量:
FONT_RATIO=".44"
OUTPUT_FPS=24
OUTPUT_COLUMNS=100
OUTPUT_FPS 决定输出帧率,OUTPUT_COLUMNS 决定最终字符画的宽度。这里宽度固定为 100 列,也正好对应前端里 AnimatedTerminal 的 columns={100}。
FONT_RATIO 则用来处理一个容易忽略的问题:终端里的字符不是正方形像素。一个字符单元通常更高、更窄,如果直接把图片按像素转字符,画面会被纵向拉伸。所以脚本会先把图片高度压缩到原来的 0.44,让最终在终端字体里看起来更接近原始比例。
后面还定义了蓝色和白色的 RGB 参考值,以及颜色距离、亮度范围:
BLUE="0,0,230"
WHITE="215,215,215"
这说明脚本并不是把所有像素都转成字符,而是只关心接近蓝色和白色的部分。其他颜色会被当作空白处理。
用 ffmpeg 拆出图片帧
generate_frame_images 里先调用 ffmpeg:
ffmpeg \
  -loglevel error \
  -i "$video_file" \
  -vf "scale=$OUTPUT_COLUMNS:-2,fps=$OUTPUT_FPS" \
  "$frame_images_dir/frame_%04d.png"
这一步会把输入视频拆成一组 png 图片,并且在拆帧时完成两件事:
scale=$OUTPUT_COLUMNS:-2:把宽度缩放到 100 像素,高度按比例自动计算fps=$OUTPUT_FPS:按 24fps 输出图片帧
也就是说,视频在这里已经变成了 frame_0001.png、frame_0002.png 这样的图片序列。
用 ImageMagick 读取像素
接着脚本会遍历每一张 png。前面提到过,终端字符不是正方形,所以它先用 ImageMagick 调整高度:
magick "$f" -resize "x$new_height"'!' "$squished_image_file"然后再把图片导出成 ImageMagick 的文本格式:
magick "$f" "$imagemagick_text_file"这个文本文件会按行描述每个像素的位置和颜色。脚本随后逐行读取它,解析出坐标和 RGB:
local xy="$(echo "$line" | cut -f1 -d ' ' | sed 's/://g')"
local rgb="$(echo "$line" | cut -f2 -d ' ' | cut -d "(" -f 2 | cut -d ")" -f1)"
当 column 回到 0 且 row 不是 0 时,就说明进入了新的一行,于是往输出 .txt 文件里写一个换行。这样图片里的二维像素矩阵,就被转换成了文本里的行列结构。
把像素映射成字符
最核心的是 pixel_for 函数。它会先计算当前像素的亮度:
local luminance=$(awk -v r="$r" -v g="$g" -v b="$b" 'BEGIN{print int((0.2126 * r + 0.7152 * g + 0.0722 * b) / 1)}')这里用的是相对亮度公式:绿色权重最高,红色其次,蓝色最低。这比简单地 (r + g + b) / 3 更符合人眼对亮度的感知。
然后脚本计算当前像素到蓝色、白色参考值的距离:
local blue_distance="$(color_distance_from "$BLUE" "$1")"
local white_distance="$(color_distance_from "$WHITE" "$1")"
如果像素接近蓝色,就输出 B0 到 B9;如果接近白色,就输出 W0 到 W9;否则输出空格。
这里的 B 和 W 只是中间标记,后面的数字才表示亮度等级。亮度越高,数字越大。
最后,脚本用一串 sed 把数字替换成不同密度的字符:
sed 's/0/·/g' \
| sed 's/1/~/g' \
| sed 's/2/o/g' \
| sed 's/3/x/g' \
| sed 's/4/+/g' \
| sed 's/5/=/g' \
| sed 's/6/*/g' \
| sed 's/7/%/g' \
| sed 's/8/$/g' \
| sed 's/9/@/g'
这组字符从稀疏到密集排列,正好可以模拟不同亮度的像素。比如 · 很轻,@ 很重,于是字符画就有了明暗层次。
蓝色区域还会先被 Perl 包成 span:
perl -pe 's/(B[0-9](?:B[0-9])*)/<span class="b">\1<\/span>/g'所以前面看到的帧文件里才会出现 <span class="b">...</span>。这一步把“颜色信息”保留下来,而不是在转成字符后完全丢掉。
前端播放逻辑
经过脚本处理后,每一帧都已经是前端可以直接渲染的文本。AnimatedTerminal 要做的事就很简单了:
- 用
requestAnimationFrame建一个稳定的动画循环 - 根据
frameLengthMs控制实际更新频率 - 每次更新时把
currentFrame加一 - 用取模让动画循环播放
这里没有使用 setInterval,而是自己封装了一个 AnimationManager。好处是动画循环仍然挂在浏览器的 requestAnimationFrame 上,但帧更新可以按指定 FPS 节流,不需要每个浏览器渲染帧都切换一次文本内容。
组件里还有一个小彩蛋:输入 Konami Code(上、上、下、下、左、右、左、右、B、A) 后,会把动画 FPS 切到 240,再输入一次切回来。
小结
Ghostty 官网这个效果看起来像是“网页里跑了一个终端动画引擎”,但拆开以后会发现,它的思路非常朴素:
- 离线阶段:用
ffmpeg和 ImageMagick 把视频转成字符画帧 - 构建阶段:读取
.txt文件,整理成帧数组 - 运行阶段:React 只负责按时间切换当前帧
这个实现最巧妙的地方在于,它把视频到字符画的转换放在离线阶段完成,浏览器端只需要像播放胶片一样逐帧切换文本。最终呈现出来的是一个很有质感的终端动画,但运行时成本其实很低。